
X
Search for...

How to install your garden flagpole: a step-by-step guide
24th Mar 2022
Adding a garden flagpole to your property landscape is a great way to make a statement or show your support for a particular cause. Plus, it can be an excellent garden project to undertake. But before purchasing a flagpole, one of the biggest questions you may have is, “How easy is it to install a flagpole?”. No matter the specific type of flagpole you’ve bought, or are considering buying, installation can be a simple process with our step-by-step guide. Here’s what you need to do to install your garden flagpole:
1. Choose the right location for your garden flagpole

You may have already decided where you’d like your flagpole to be positioned, however it’s important to check for any power cables or pipes that may run under the ground of your desired location. You’ll be digging a hole that’s over 2 feet deep, so think carefully about the best place to install your garden flagpole. Make sure that the space is free from any obstructions.
2. Make sure you have the right tools and materials
First thing’s first, you need the right tools and materials to be able to install your garden flagpole safely. When you receive your flagpole, check the parts you’ve been sent to make sure you have everything you need. Here’s what to expect when your garden flagpole arrives:
– Your chosen pole (if you have selected a step-tapered pole, this will have two pieces)
– Ground sleeve
– Your chosen finial
– Rope and cleat
Read the ‘parts checklist’ section in the relevant installation guide. These can be found in the ‘Product Downloads’ section of our Garden flagpole products.
Other tools and materials required:
– A digging tool: tile spade, shovel, digging bar or clamshell digger
– Cement mix (preferably ready-mixed)
– Something to mix the cement in: a bucket, wheelbarrow, cement mixer or mixing board
– A handheld smoothing tool
– A spirit level
– A flat-headed screwdriver
3. Mark out the foundations, dig and fill with concrete
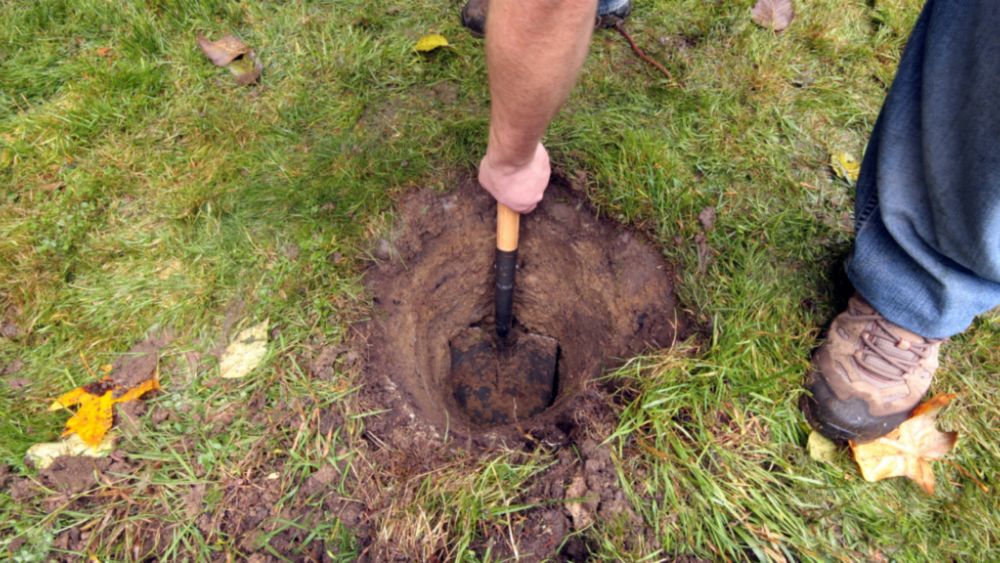 It’s time to get started! Make sure you dig the foundations to the required size (this is specified in your installation guide) and check to make sure the base is level. Once you’re happy with the foundations, you can pour the cement in.
4. Put the ground sleeve in place and leave the concrete to set
All garden flagpoles need a ground sleeve to hold it in place. This is the stage of the installation that requires you to place the ground sleeve into the wet cement. As soon as it’s in place and level, you need to leave the concrete to set for approximately seven to ten days.
5. Assemble the flagpole
Depending on which garden flagpole you’ve purchased or are looking to buy, this step can vary. We have created handy installation guides for each of our poles and their variations to help make this process as simple as possible:
Classic Garden Flagpole (Straight)
– 1 Piece Pole (internal roping and external roping)
– 2 Piece Pole (internal roping and external roping)
Deluxe Garden Flagpole (Step Tapered) External Roping
Executive Garden Flagpole (Tapered) External Roping
You can also watch our video on how to install your garden flagpole here.
6. Put the flagpole into position and fly your flag
Once the foundations have set and you’ve assembled the flagpole, you can carefully place it into the ground sleeve and walk the flagpole to a vertical position. Note, you may need someone to help you here because of the length of the pole. Once your flagpole is installed, you can expect to lose approximately 10% of the pole length into the ground. Make sure the flagpole is straight and then fasten the locking nuts to secure it in place.
You can then use the halyard (rope) to attach and hoist your flag. If you haven’t purchased your flag or would like a replacement flag, you can view our range here. Prefer a custom design? That’s no problem, speak to our team today who will be happy to help.
7. Relax and admire your flag
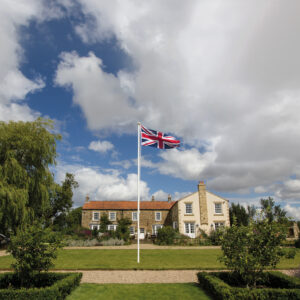
At this point, you can sit back and watch your flag fly in all its glory atop your flagpole. Well done, you’ve successfully installed your garden flagpole!
We hope this has reassured you that installing a flagpole in your garden doesn’t need to be hard work and can provide an elegant addition to any garden. Simply follow the instructions and your flag will be flying in no time.
But, if you would like more support on the installation process, contact our helpful team of flagpole and flag experts on 01325 390 195 or send us a message by completing our online enquiry form. Alternatively, we have a specialist installation team who work nationwide and can take care of the installation process for you. Find out more here.
Harrison Flagpoles is the only independent manufacturer of glassfibre flagpoles in the UK. Our 50-year manufacturing heritage has equipped us with the experience, knowledge and skills needed to undertake even the most complex and challenging of jobs.
We also offer a wide range of flags, from classic hand sewn to standard digitally printed, and we also have environmentally friendly options available. Ask us about our Harrison Eco™ range of products and services.